Application to large, flat surfaces
Surface Armor films are as easy to apply as a strip of tape. Yet, as the size of that strip of tape/film increases in both width and length, the difficulty factor can increase just a tad. The physical act of handling a piece of tape 4 feet wide by 8 feet long is a rather different matter from handling a piece of tape that is 1 inch wide by 4 inches long.
A somewhat greater challenge is in getting a large piece of film perfectly aligned to the target surface and then laid down, without creating those unsightly wrinkles or air bubbles which might detract from the perceived value of the protected surface.
One method of application is to have two people apply the film. One person holds the roll of film while the other person pulls the loose end to the opposite end of the target material, affixes the end to the target surface and then manually presses the film into position, working back towards the person holding the roll of film. This method is a bit labor intense, but it works reasonably well.
Another method for manually applying a large sheet of film to a large sheet of material is to apply the material to the film. The following procedure describes a relatively simple method for applying a large piece (4.5 x 8.5 foot) of Surface Armor to a 4×8 foot sheet of material. You will need a roll of double sided tape and a utility knife. (Note: the material in question should be able to tolerate some amount of physical handling for this method to work successfully.)

How to apply protective film:
- Prepare a suitably large, flat work space – larger than the object to be protected − that is clean and free of dust, liquid or contaminants.
- Affix a 4.5-foot strip of double-sided tape near each end of the work space… roughly 8.5 feet apart. These will be used to hold the film, not the material that is to be protected.
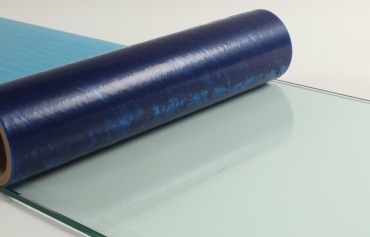
- With the adhesive side facing up, unroll a short section of the protective film. Ensure that it is smooth and wrinkle-free, and attach the loose end evenly to one of the strips of double-sided tape.
- Continue unwinding the protective film, laying it out across the length of the work surface to a point just short of the other strip of double-sided tape.
- Now, raise the roll of film up and unwind it above and just beyond the double-sided tape. Taking care not to pull the originally attached end free of its tape, adjust the alignment of the film to ensure that it is straight, free of wrinkles and reasonably taut, but not stretched so tightly that the film will tend to shrink back later on. (When films are stretched during application, the edges have a tendency to pull up later on when the film tries to return to its original shape.)
- Lower the film onto the second strip of double sided tape.
- Using the utility knife, cut the roll away from the now secured sheet of film that is waiting to receive the sheet material that is to be protected.
- Square up and position one edge of the piece of sheet material at one end or side of the protective film. Position it just inside where the film is held by the strips of double-sided tape.
- Gradually lay the part down onto the adhesive film. NOTE: If the sheet of material is flexible, put a little flex into it as you lay it down on the film, thereby rolling it down and allowing air to escape from between the material and the film.
- Voila! You are just about done.
- To ensure that the sheet of material is attached to the film, apply pressure to the material, particularly along all edges, to assure a good bonding. A clean paint roller might be used for this purpose.
- With the utility knife, trace the outline of the part on the protective film, cutting away the excess film. Remove the excess and dispose of it.
- Carefully turn the part over and, if required, apply pressure directly to the film, working outward from the middle, to ensure that the entire area is well adhered.
- Inspect the finished piece for a complete, wrinkle-free coverage.
